CMake

First, modify the CMakeLists.txt file to use the project() command to set the project name and version number.

cmake_minimum_required(VERSION 3.10)

# set the project name and version
project(Tutorial VERSION 1.0)

The easiest way to enable support for a specific C++ standard in CMake is by using the CMAKE_CXX_STANDARD variable. For this tutorial, set the CMAKE_CXX_STANDARD variable in the CMakeLists.txt file to 11 and CMAKE_CXX_STANDARD_REQUIRED to True. Make sure to add the CMAKE_CXX_STANDARD declarations above the call to add_executable.

cmake_minimum_required(VERSION 3.10)

# set the project name and version
project(Tutorial VERSION 1.0)

# specify the C++ standard
set(CMAKE_CXX_STANDARD 20)
set(CMAKE_CXX_STANDARD_REQUIRED True)
set(COMPILE_OPTIONS -std=c++11)

add executable files

add_executable (Tutorial "testCmake.cpp" "testCmake.h" "A.h" "A.cpp")
#the output or target of build is Tutorial

once you change the version of standard c++ to 20 you can use execution library

#include <iostream>
#include <algorithm>
#include <vector>
#include <execution>

int main(int argc, char* argv[])
{
	std::vector<uint16_t> vec{ 34,545,23,56,565,54,24,54,6,7,4,5334,5,65,7,5 };
	std::for_each(std::execution::par, vec.begin(), vec.end(), [](uint16_t v) {std::cout << v << std::endl; });
	std::cout << "!\n";
}

toolchain

CMake uses a toolchain of utilities to compile, link libraries and create archives, and other tasks to drive the build.
there are two ways to add it inside cmakeLists

set( CMAKE_TOOLCHAIN_FILE "C:/vcpkg/scripts/buildsystems/vcpkg.cmake" )

or by command line

cmake -DCMAKE_TOOLCHAIN_FILE=/foo/bar.cmake <other args>

prefix path used to help cmake for commands like find_package or find_path

cmake -DCMAKE_PREFIX_PATH=~/deliveries/hiphop

include files and libraries

after you add CMAKE_TOOLCHAIN_FILE OR CMAKE_PREFIX_PATH to your project actually you can looking for path or library or package and add them to your cmakelist file lets start with find_path

how to add include path

#looking for path of boost/coroutine/all.hpp and save it in variable 
LIBS_PATH 
find_path(LIBS_PATH boost/coroutine/all.hpp) 

#then add it to executable target project in our situation is Tutorial
#private is mean all directories added to this target cannot access by other target
target_include_directories(Tutorial PRIVATE
                           ${LIBS_PATH}
                          )
#the difference between target_include_directories and include_directories
#the first one affect on the target only and the second one affect on the all targets in cmakelist
include_directories(${LIBS_PATH})

Packages and Libraries

Packages provide dependency information to CMake based buildsystems. Packages are found with the find_package() command. The result of using find_package() is either a set of IMPORTED targets, or a set of variables corresponding to build-relevant information.
Imagine you want to use zlib in your project, you need to find the header file zlib.h, and the library libz.so (on Linux). You can use the low-level cmake commands find_path and find_library to find them, or you can use find_package(ZLIB). The later command will try to find out all what is necessary to use zlib. It can be extra macro definitions, or dependencies.
find_package: when the CMake command find_package(SomeThing) is called, as says the documentation, there are two possibility: the module mode (that searches for a file FindSomeThing.cmake), or the config mode (that searches for a file named SomeThingConfig.cmake). 

#add zlib
find_package (ZLIB REQUIRED)
if (ZLIB_FOUND)
  include_directories(${ZLIB_INCLUDE_DIRS})
  target_link_libraries (Tutorial ${ZLIB_LIBRARIES})
endif (ZLIB_FOUND)

#add opencv
# Find Package
find_package( OpenCV REQUIRED )
if( OpenCV_FOUND )
  # Additional Include Directories
  include_directories( ${OpenCV_INCLUDE_DIRS} )
  # Additional Library Directories
  link_directories( ${OpenCV_LIB_DIR} )
  # Additional Dependencies
  target_link_libraries( project ${OpenCV_LIBS} )
endif()

#add coroutine library from boost
find_package(Boost REQUIRED COMPONENTS coroutine)
target_link_libraries(testCmake PRIVATE Boost::coroutine)

#if is there no dependencies like zlib you can use 
find_library(ZLIB_LIB zlib)
target_link_libraries (testCmake ${ZLIB_LIB})

Qt With Cmake

cmake_minimum_required(VERSION 3.1.0)

project(helloworld VERSION 1.0.0 LANGUAGES CXX)

set(CMAKE_CXX_STANDARD 11)
set(CMAKE_CXX_STANDARD_REQUIRED ON)
set(CMAKE_PREFIX_PATH "/home/rip/Qt/5.12.1/gcc_64/lib/cmake")
set(CMAKE_AUTOMOC ON)
set(CMAKE_AUTORCC ON)
set(CMAKE_AUTOUIC ON)

if(CMAKE_VERSION VERSION_LESS "3.7.0")
    set(CMAKE_INCLUDE_CURRENT_DIR ON)
endif()

find_package(Qt5 COMPONENTS Widgets REQUIRED)

add_executable(helloworld
    mainwindow.ui
    mainwindow.cpp
    main.cpp
    resources.qrc
)

target_link_libraries(helloworld Qt5::Widgets)

if you never add toolchain or prefix path

cmake_minimum_required (VERSION 3.9)

project ("testCmake" VERSION 1)
set(CMAKE_CXX_STANDARD 17)
set(CMAKE_CXX_STANDARD_REQUIRED True)
add_executable(testCmake "src/main.cpp")
include_directories("C:/dev/vcpkg/installed/x64-windows")
find_path(ZLIB_PATH "zlib.h")
include_directories(${ZLIB_PATH})
link_directories("C:/dev/vcpkg/installed/x64-windows/lib/")
FIND_LIBRARY(mylib zlib)
message("zlib in ${mylib}")
TARGET_LINK_LIBRARIES(testCmake ${mylib})

How To Create library and attach it to our project

create subdirectory and add CMakeLists.txt to it

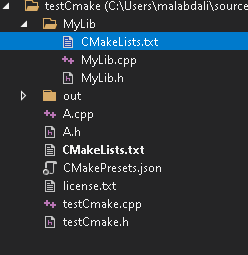
ADD_LIBRARY(MyLib STATIC|SHARED MyLib.cpp MyLib.h)

then back to main CmakeLists and add the folder as asubdirectory and link to it library dont warry cmake automaticly add .lib or .a to file and the last thing you can add directory as include directory

add_subdirectory(${CMAKE_CURRENT_SOURCE_DIR}/MyLib)
target_link_libraries(Tutorial PRIVATE MyLib)
target_include_directories(Tutorial PRIVATE MyLib)

#or 

add_subdirectory(${CMAKE_CURRENT_SOURCE_DIR}/MyLib)
target_link_libraries(Tutorial PRIVATE ${CMAKE_CURRENT_BINARY_DIR}/MyLib/MyLib.lib)
target_include_directories(Tutorial PRIVATE MyLib)

cpack

#add this to end of CMakeLists
include(InstallRequiredSystemLibraries)
set(CPACK_RESOURCE_FILE_LICENSE "${CMAKE_CURRENT_SOURCE_DIR}/license.txt")
set(CPACK_PACKAGE_VERSION_MAJOR "1")
set(CPACK_PACKAGE_VERSION_MINOR "2")
include(CPack)

after finished from build project you can call cpack command inside build directory

Miscellaneous

example Add all files in the project to executable

set(FORMS_DIR "${CMAKE_SOURCE_DIR}/forms")
set(INCLUDE_DIR "${CMAKE_SOURCE_DIR}/include")
set(SOURCE_DIR "${CMAKE_SOURCE_DIR}/src")

include_directories(${FORMS_DIR})
include_directories(${INCLUDE_DIR})
include_directories(${SOURCE_DIR})

file(GLOB_RECURSE SOURCES
    "${FORMS_DIR}/*.ui"
    "${FORMS_DIR}/*.qrc"
    "${INCLUDE_DIR}/*.h"
    "${SOURCE_DIR}/*.cpp"
)

add_executable(MY_PROJECT ${SOURCES})

if (system)

if (WIN32)
    #do something
elseif (UNIX)
    #do something
endif ()
#other example
if(UNIX AND NOT APPLE)
    # for Linux, BSD, Solaris, Minix
endif()
#other example
if (MSVC)
    #do something
endif (MSVC)

copy files to binary folder

set(QML_FOLDER "qmls")
file(GLOB_RECURSE QMLS "${QML_FOLDER}/*.qml")
file(COPY ${QMLS} DESTINATION ${CMAKE_CURRENT_BINARY_DIR}/${QML_FOLDER})

check compiler

if (CMAKE_CXX_COMPILER_ID STREQUAL "Clang")
    # using Clang
elseif (CMAKE_CXX_COMPILER_ID STREQUAL "GNU")
    # using GCC
elseif (CMAKE_CXX_COMPILER_ID STREQUAL "Intel")
    # using Intel C++
elseif (CMAKE_CXX_COMPILER_ID STREQUAL "MSVC")
    # using Visual Studio C++
endif()

set compiler flags

set(CMAKE_CXX_FLAGS "${CMAKE_CXX_FLAGS} -std=c++14 -DNO_DEBUG")
set(CMAKE_CXX_FLAGS "-Wall -Wextra")
set(CMAKE_CXX_FLAGS_DEBUG "-g")
set(CMAKE_CXX_FLAGS_RELEASE "-O3")

Windows Subsystem for Linux (WSL)

install wsl

wsl --install
//or
wsl --install -d <Distribution Name>
// to set default wsl version 
wsl --set-default-version 2
//set default distribution
wsl -s Ubuntu-20.04

get all avialable or online Distributions

wsl -l
// or 
wsl --list --online

shutdown and boot

//boot specific distribution
wsl -d ubuntu-20.04
//to shutdown all distributions
wsl --shutdown 

you can install windows terminal application for esier work

visual studio connection with remote linux server

at the first you must install tools to can build cmake + compilers in your linux distribution

sudo apt update
sudo apt install g++ gdb make ninja-build rsync zip
//in order to work remotely 
sudo apt install openssh-server
sudo service ssh start
sudo systemctl enable ssh //start service on linux startup

for more information read this and this

vcpkg

Vcpkg helps you manage C and C++ libraries on Windows, Linux and MacOS. This tool and ecosystem are constantly evolving, and we always appreciate contributions!

//for windows
> git clone https://github.com/microsoft/vcpkg
> .\vcpkg\bootstrap-vcpkg.bat
> set PATH=vcpkg_folder;%PATH%	
//for linux you need g++
$ sudo apt-get update
$ sudo apt-get install build-essential tar curl zip unzip
$ sudo apt-get install -y pkg-config
$ git clone https://github.com/microsoft/vcpkg
$ ./vcpkg/bootstrap-vcpkg.sh

Search , Install and remove packages

.\vcpkg\vcpkg search [search term]
.\vcpkg\vcpkg install [packages to install]
.\vcpkg\vcpkg install [package name]:x64-windows
.\vcpkg\vcpkg install [packages to install] --triplet=x64-windows
.\vcpkg\vcpkg remove [packages to install]

In order to use vcpkg with Visual Studio, run the following command (may require administrator elevation):

.\vcpkg\vcpkg integrate install
.\vcpkg\vcpkg integrate remove

In order to use vcpkg with CMake outside of an IDE, you can use the toolchain file:

> cmake -B [build directory] -S . -DCMAKE_TOOLCHAIN_FILE=[path to vcpkg]/scripts/buildsystems/vcpkg.cmake
> cmake --build [build directory]

for more visit this page

Bluetooth Low Energy (BLE)

Bluetooth Low Energy also works on the same 2.4 GHz ISM frequency band. What this means is that a single antenna can be used for Wi-Fi and both the versions of Bluetooth.

A BLE device can have 5 possible states:

  • Standby
  • Advertising
  • Scanning
  • Initiating
  • Connected

Important Terms in BLE

Let us briefly see some of the important terms associated with BLE.

  • GATT: It is short for Generic Attribute Profile. It defines the specifications for data transfer between BLE devices using Service and Characteristics.
  • Characteristic: Characteristic is a group of information called Attribute and Attribute is a group of information transferred between devices. A characteristic usually contains the following attributes:
  • Value: Data value of the characteristic
  • Declaration: Properties of the characteristic (location, type like read, write, notify, indicate etc.)
  • Description: ASCII String describing the characteristic.
  • Service: A collection of characteristics is called a Service. Each Service has a unique 16-bit or 128-bit ID called UUID.
  • UUID: Universally Unique Identifier is a 128-bit ID given to each service and characteristic in a profile. Use the website UUIDGenerator to generate unique IDs. Each service and characteristic has a unique 16-bit or 128-bit ID called UUID. A sample UUID looks something like this:
    •  583f8b30-74b4-4757-8143-56048fd88b25 

ESP32 BLE Server

#include <BLEDevice.h>
#include <BLEUtils.h>
#include <BLEServer.h>

#define SERVICE_UUID        "4fafc201-1fb5-459e-8fcc-c5c9c331914b"
#define CHARACTERISTIC_UUID "beb5483e-36e1-4688-b7f5-ea07361b26a8"

BLEDevice::init("ESP32-BLE-Server");
BLEServer *pServer = BLEDevice::createServer();
BLEService *pService = pServer->createService(SERVICE_UUID);
BLECharacteristic *pCharacteristic = pService->createCharacteristic(
                CHARACTERISTIC_UUID,
                BLECharacteristic::PROPERTY_READ |
                BLECharacteristic::PROPERTY_WRITE
                                       );

  pCharacteristic->setValue("Hello, World!");
  pService->start();
  //BLEAdvertising *pAdvertising = pServer->getAdvertising();
  BLEAdvertising *pAdvertising = BLEDevice::getAdvertising();
  pAdvertising->addServiceUUID(SERVICE_UUID);
  pAdvertising->setScanResponse(true);
  pAdvertising->setMinPreferred(0x06);  // functions that help with iPhone connections issue
  pAdvertising->setMinPreferred(0x12);
  BLEDevice::startAdvertising();

  //std::string value = pCharacteristic->getValue();

Callbacks

Characteristic Callbacks

class BLECharacteristicCallbacks {
public:
	typedef enum {
		SUCCESS_INDICATE,
		SUCCESS_NOTIFY,
		ERROR_INDICATE_DISABLED,
		ERROR_NOTIFY_DISABLED,
		ERROR_GATT,
		ERROR_NO_CLIENT,
		ERROR_INDICATE_TIMEOUT,
		ERROR_INDICATE_FAILURE
	}Status;

	virtual ~BLECharacteristicCallbacks();
	virtual void onRead(BLECharacteristic* pCharacteristic);
	virtual void onWrite(BLECharacteristic* pCharacteristic);
	virtual void onNotify(BLECharacteristic* pCharacteristic);
	virtual void onStatus(BLECharacteristic* pCharacteristic, Status s, uint32_t code);
};

class MyCallbacks: public BLECharacteristicCallbacks
{
  void onWrite(BLECharacteristic *pCharacteristic) override
  {
    std::string value = pCharacteristic->getValue();

    if (value.length() > 0)
    {
      Serial.print("New value: ");
      for (int i = 0; i < value.length(); i++)
      {
        Serial.print(value[i]);
      }
      Serial.println();
    }
  }
  
  void onRead(BLECharacteristic *pCharacteristic)override{
    Serial.print("client read value : ");
    Serial.println(pCharacteristic->getValue().c_str());
  }
};

pCharacteristic->setCallbacks(new MyCallbacks());

server callbacks

class MyServerCallbacks: public BLEServerCallbacks {
    void onConnect(BLEServer* pServer) {
      Serial.println("device connected");
      deviceConnected = true;
    };

    void onDisconnect(BLEServer* pServer) {
      Serial.println("device disconnected");
      deviceConnected = false;
    }
};

pServer->setCallbacks(new MyServerCallbacks());

Descriptors

GATT characteristic descriptors (commonly called simply descriptors) are mostly used to provide the client with metadata (additional information about the characteristic and its value). They are always placed within the characteristic definition and after the characteristic value attribute. Descriptors are always made of a single attribute, the characteristic descriptor declaration, whose UUID is always the descriptor type and whose value contains whatever is defined by that particular descriptor type.

descriptor=new BLEDescriptor("CADE");
descriptor->setValue("new descriptor");
pCharacteristic->addDescriptor(descriptor);

BLE notify

BLE standard defines two ways to transfer data for the server to the client: notification and indication. Notifications and indications are initiated by the Server but enabled by the Client. Notification doesn’t need to be acknowledged, so they are faster and an efficient way to read data continuously. Hence, a server does not know if the message reaches to the client. Indication needs to be acknowledged for communicating. The client sent a confirmation message back to the server, this way server knows that message reached the client. Notification process similar to the reading of data.

class MyCallbacks: public BLECharacteristicCallbacks
{
  void onStatus(BLECharacteristic* pCharacteristic, Status s, uint32_t code)override{
    Serial.print("character status changed : ");
    pCharacteristic->getDescriptorByUUID("")->setCallbacks(new BLEDescriptorCallbacks());
    switch (s)
    {
    case Status::SUCCESS_INDICATE:
      Serial.println("Status::SUCCESS_INDICATE");
      break;
      case Status::ERROR_INDICATE_FAILURE:
      Serial.println("Status::ERROR_INDICATE_FAILURE");
      break;
      case Status::ERROR_INDICATE_TIMEOUT:
      Serial.println("Status::ERROR_INDICATE_TIMEOUT");
      break;
      case Status::ERROR_INDICATE_DISABLED:
      Serial.println("Status::ERROR_INDICATE_DISABLED");
      break;
    }
  } 
};
pCharacteristic = pService->createCharacteristic(
                      CHARACTERISTIC_UUID,
                      BLECharacteristic::PROPERTY_READ   |
                      BLECharacteristic::PROPERTY_WRITE  |
                      BLECharacteristic::PROPERTY_NOTIFY |
                      BLECharacteristic::PROPERTY_INDICATE
                    );
pCharacteristic->addDescriptor(new BLE2902());//add indications and notifications
pCharacteristic->setCallback(new MyCallbacks());
if (deviceConnected) {

   pCharacteristic->setValue(&value, 1); 
   pCharacteristic->notify(); 
   //pCharacteristic->indicate(); 
   value++; 
}

Reflections and Attributes

The .NET reflection services allow you to discover, using APIs from the System.Reflection namespace, the same information that you can see with the tools mentioned earlier. The key to this process is the type called System.Type, which contains members that expose all of a type’s metadata. This is done with the help of other types from the System.Reflection namespace

class A
{
    public int val;
    public int value
    {
        private set
        {
            val = value;
        }
        get
        {
            return val;
        }
    }
    public A(int i)
    {
        this.val = i;   
    }
}

A a=new A(12);
Type t1 =typeof(A);
Type t2 = a.GetType();
Type t3=Type.GetType("A");
Console.WriteLine((t1 == t2) && (t1 == t3));//true
A aa=(A)Activator.CreateInstance(t1, 12);
t1.GetProperty("value").GetSetMethod(true)?.Invoke(aa, new object[] { 44 });
Console.WriteLine(t1.GetField("val").GetValue(aa));//44

Attributes

Attributes provide meta-information about assemblies, types, and members. This meta-information is consumed by the compiler, the CLR, or tools that use reflection services to read them. Attributes are actually types that derive from the System.Attribute abstract class.

class DescriptionAttribute : Attribute
{
    public string Text { get; private set; }
    public bool Required { get; set; }
    public DescriptionAttribute(string description)
    {
        Text = description;
    }
}
[Description("Main component of the car", Required = true)]
class Engine
{
}
[AttributeUsage(AttributeTargets.Class|
                AttributeTargets.Struct|
                AttributeTargets.Method|
                AttributeTargets.Property|
                AttributeTargets.Field,
                AllowMultiple = true,
                Inherited = true)]
class DescriptionAttribute : Attribute
{
    public string Text { get; private set; }
    public bool Required { get; set; }
    public DescriptionAttribute(string description)
    {
        Text = description;
    }
}
[Serializable]
[Description("Main component of the car")]
[ComVisible(false)]
class Engine
{
}
[Serializable, 
 Description("Main component of the car"), 
 ComVisible(false)]
class Engine
{
}

Attributes In Reflections

var e = new Engine("M270 Turbo", 1600, 75.0);
var type = e.GetType();
var attributes = type.GetCustomAttributes(typeof(DescriptionAttribute), 
                                          true);
if (attributes != null)
{
    foreach (DescriptionAttribute attr in attributes)
    {
        Console.WriteLine(attr.Text);
    }
}
var properties = type.GetProperties();
foreach (var property in properties)
{
    var pattributes = 
      property.GetCustomAttributes(
         typeof(DescriptionAttribute), false);
    if (attributes != null)
    {
        foreach (DescriptionAttribute attr in pattributes)
        {
            Console.WriteLine(
              $"{property.Name} [{attr.Text}]");
        }
    }
}

Delgates , Events And Lambda expressions

Delegates

delegate is defined using the delegate keyword. The declaration looks like a function signature, but the compiler actually introduces a class that can hold references to methods whose signatures match the signature of the delegate. A delegate can hold references to either static or instance methods.

public enum Status { Started, Stopped }
public delegate void StatusChange(Status status);
public class Engine
{
    private StatusChange statusChangeHandler;// is Delegate return true
    public void RegisterStatusChangeHandler(StatusChange handler)
    {
        statusChangeHandler = handler;
    }
    public void Start()
    {
        // start the engine
        if (statusChangeHandler != null)
            statusChangeHandler(Status.Started);
    }
    public void Stop()
    {
        // stop the engine
        if (statusChangeHandler != null)
            statusChangeHandler(Status.Stopped);
    }
}

Combining delegates

ExpressionResult
null + d1d1
d1 + nulld1
d1 + d2[d1, d2]
d1 + [d2, d3][d1, d2, d3]
[d1, d2] + [d2, d3][d1, d2, d2, d3]
[d1, d2] – d1d2
[d1, d2] – d2d1
[d1, d2, d1] – d1[d1, d2]
[d1, d2, d3] – [d1, d2]d3
[d1, d2, d3] – [d2, d1][d1, d2, d3]
[d1, d2, d3, d1, d2] – [d1, d2][d1, d2, d3]
[d1, d2] – [d1, d2]null

Events

Events aren’t Delegate instances.

using System;

class Test
{
    public event EventHandler MyEvent
    {
        add
        {
            Console.WriteLine ("add operation");
        }
        
        remove
        {
            Console.WriteLine ("remove operation");
        }
    }  
    static void Main()
    {
        Test t = new Test();
        
        t.MyEvent += new EventHandler (t.DoNothing);
        t.MyEvent -= null;
    }
    void DoNothing (object sender, EventArgs e)
    {
    }
}
private EventHandler _myEvent;
    
public event EventHandler MyEvent
{
    add
    {
        lock (this)
        {
            _myEvent += value;
        }
    }
    remove
    {
        lock (this)
        {
            _myEvent -= value;
        }
    }        
}

Lambda expressions

  • The variables that are introduced in a lambda expression are not visible outside the lambda (for instance, in the enclosing method).
  • A lambda cannot capture inref, or out parameters from the enclosing method.
  • Variables that are captured by a lambda expression are not garbage collected, even if they would otherwise go out of scope until the delegate that the lambda is assigned to is garbage collected.
bool IsOdd(int n) { return n % 2 == 1; }
var list = new List<int>() { 1, 2, 3, 4, 5, 6, 7, 8, 9 };
list.RemoveAll(IsOdd);
var list = new List<int>() { 1, 2, 3, 4, 5, 6, 7, 8, 9 };
list.RemoveAll(delegate (int n) { return n % 2 == 1; });
var list = new List<int>() { 1, 2, 3, 4, 5, 6, 7, 8, 9 };
list.RemoveAll(n => n % 2 == 1);