Mat green=Mat(1,1,CV_8UC,Scalar(0,255,0)),hsv_green;
cv::cvtColor(green,hsv_green,cv::COLOR_BGR2HSV);
vec<uint8_t,3> value=hsv_green.at<vec<uint8_t,3>>(0,0);
Now you take [H-10, 100,100] and [H+10, 255, 255] as the lower bound and upper bound respectively.
Object Color Tracking by inRange
    # Take each frame
    _, frame = cap.read()
    # Convert BGR to HSV
    hsv = cv.cvtColor(frame, cv.COLOR_BGR2HSV)
    # define range of blue color in HSV
    lower_blue = np.array([110,50,50])
    upper_blue = np.array([130,255,255])
    # Threshold the HSV image to get only blue colors
    mask = cv.inRange(hsv, lower_blue, upper_blue)
    # Bitwise-AND mask and original image
    res = cv.bitwise_and(frame,frame, mask= mask)
Transformations
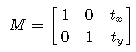
OpenCV provides two transformation functions, warpAffine and warpPerspective, with which you can perform all kinds of transformations. warpAffine takes a 2×3 transformation matrix while warpPerspective takes a 3×3 transformation matrix as input.
resize Imgae Scaling is just resizing of the image. OpenCV comes with a function resize() for this purpose. The size of the image can be specified manually, or you can specify the scaling factor. Different interpolation methods are used. Preferable interpolation methods are INTER_AREA for shrinking and INTER_CUBIC (slow) & INTER_LINEAR for zooming. By default, the interpolation method INTER_LINEAR is used for all resizing purposes. You can resize an input image with either of following methods:
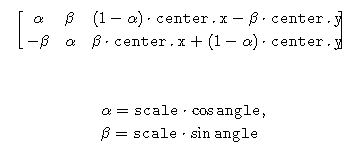
Mat cv::getRotationMatrix2D	(	Point2f 	center,
double 	angle,
double 	scale
)
M = getRotationMatrix2D(((cols-1)/2.0,(rows-1)/2.0),90,1)
warpAffine(img,dest,M,(cols,rows))
Affine Transformation
In affine transformation, all parallel lines in the original image will still be parallel in the output image. To find the transformation matrix, we need three points from the input image and their corresponding locations in the output image. Then getAffineTransform will create a 2×3 matrix which is to be passed to warpAffine.
Mat cv::getAffineTransform	(	const Point2f 	src[],
const Point2f 	dst[]
)

Parameters
src	Coordinates of triangle vertices in the source image.
dst	Coordinates of the corresponding triangle vertices in the destination image.
Perspective Transformation
For perspective transformation, you need a 3×3 transformation matrix. Straight lines will remain straight even after the transformation. To find this transformation matrix, you need 4 points on the input image and corresponding points on the output image. Among these 4 points, 3 of them should not be collinear. Then the transformation matrix can be found by the function getPerspectiveTransform. Then apply warpPerspective with this 3×3 transformation matrix.
Mat cv::getPerspectiveTransform	(	InputArray 	src,
InputArray 	dst,
int 	solveMethod = DECOMP_LU
)
pts1 = np.float32([[56,65],[368,52],[28,387],[389,390]])
pts2 = np.float32([[0,0],[300,0],[0,300],[300,300]])
Mat M = getPerspectiveTransform(pts1,pts2)
warpPerspective(img,dst,M,(300,300))
Mat src, src_gray;
Mat dst, detected_edges;
int lowThreshold = 0;
const int max_lowThreshold = 100;
const int ratio = 3;
const int kernel_size = 3;
const char* window_name = "Edge Map";
static void CannyThreshold(int, void*)
{
    blur( src_gray, detected_edges, Size(3,3) );
    Canny( detected_edges, detected_edges, lowThreshold, lowThreshold*ratio, kernel_size );
    dst = Scalar::all(0);
    src.copyTo( dst, detected_edges);
    imshow( window_name, dst );
}
Gradient With Sobel , Scharr and Laplacian
OpenCV provides three types of gradient filters or High-pass filters Or Sharpening Filter Sobel, Scharr and Laplacian. We will see each one of them.
1. Sobel and Scharr Derivatives Sobel operators is a joint Gausssian smoothing plus differentiation operation, so it is more resistant to noise. You can specify the direction of derivatives to be taken, vertical or horizontal (by the arguments, yorder and xorder respectively). You can also specify the size of kernel by the argument ksize. If ksize = -1, a 3×3 Scharr filter is used which gives better results than 3×3 Sobel filter. Please see the docs for kernels used
2- Laplacian It calculates the Laplacian of the image given by the relation
If you want to detect both edges, better option is to keep the output datatype to some higher forms, like cv.CV_16S, cv.CV_64F etc, take its absolute value and then convert back to cv.CV_8U. Below code demonstrates this procedure for a horizontal Sobel filter and difference in results.
# Output dtype = cv.CV_8U
sobelx8u = cv.Sobel(img,cv.CV_8U,1,0,ksize=5)
# Output dtype = cv.CV_64F. Then take its absolute and convert to cv.CV_8U
sobelx64f = cv.Sobel(img,cv.CV_64F,1,0,ksize=5)
abs_sobel64f = np.absolute(sobelx64f)
sobel_8u = np.uint8(abs_sobel64f)
also, you can use dilate or erode functions to increase or decrease edges thickness
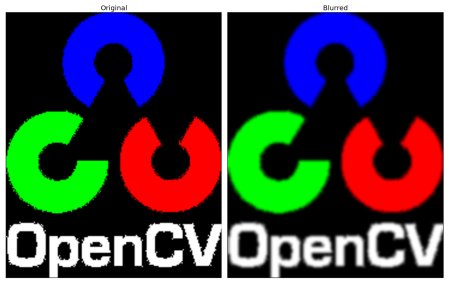
As in one-dimensional signals, images also can be filtered with various low-pass filters (LPF), high-pass filters (HPF), etc. LPF helps in removing noise, blurring images, etc. HPF filters help in finding edges in images OpenCV provides a function cv.filter2D() to convolve a kernel with an image.
Normalized Box Filter
To perform a smoothing operation we will apply a filter to our image. The most common type of filters are linear, in which an output pixel’s value .
kernel = Mat::ones(5, 5, CV_8UC);/25
dst = filter2D(img,-1,kernel)
//or
blur = blur(img,dest,5)

// or you can use boxFilter
filter2D(InputArray src, OutputArray dst, int ddepth, InputArray kernel, Point anchor=Point(-1,-1), double delta=0, int borderType=BORDER_DEFAULT )
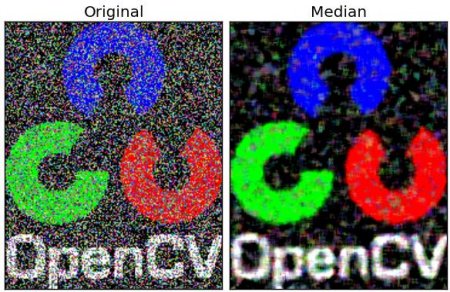
Median Filter
The median filter run through each element of the signal (in this case the image) and replace each pixel with the median of its neighboring pixels
medianBlur ( src, dst, i );//i is kernal size
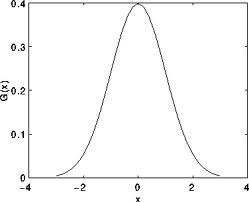
Gaussian Filter
Probably the most useful filter (although not the fastest). Gaussian filtering is done by convolving each point in the input array with a Gaussian kernel and then summing them all to produce the output array.
Just to make the picture clearer, remember how a 1D Gaussian
Assuming that an image is 1D, you can notice that the pixel located in the middle would have the biggest weight. The weight of its neighbors decreases as the spatial distance between them and the center pixel increases.
Gaussian Filter Generation
void FilterCreation(double GKernel[][5])
{
    // intialising standard deviation to 1.0
    double sigma = 1.0;
    double r, s = 2.0 * sigma * sigma;

    // sum is for normalization
    double sum = 0.0;

    // generating 5x5 kernel
    for (int x = -2; x <= 2; x++) {
        for (int y = -2; y <= 2; y++) {
            r = sqrt(x * x + y * y);
            GKernel[x + 2][y + 2] = (exp(-(r * r) / s)) / (M_PI * s);
            sum += GKernel[x + 2][y + 2];
        }
    }

    // normalising the Kernel
    for (int i = 0; i < 5; ++i)
        for (int j = 0; j < 5; ++j)
            GKernel[i][j] /= sum;
}
So far, we have explained some filters which main goal is to smooth an input image. However, sometimes the filters do not only dissolve the noise, but also smooth away the edges. To avoid this (at certain extent at least), we can use a bilateral filter.
In an analogous way as the Gaussian filter, the bilateral filter also considers the neighboring pixels with weights assigned to each of them. These weights have two components, the first of which is the same weighting used by the Gaussian filter. The second component takes into account the difference in intensity between the neighboring pixels and the evaluated one.
bilateralFilter(InputArray src, OutputArray dst, int d, double sigmaColor, double sigmaSpace, int borderType=BORDER_DEFAULT )
Parameters:
src – Source 8-bit or floating-point, 1-channel or 3-channel image.
dst – Destination image of the same size and type as src .
d – Diameter of each pixel neighborhood that is used during filtering. If it is non-positive, it is computed from sigmaSpace .
sigmaColor – Filter sigma in the color space. A larger value of the parameter means that farther colors within the pixel neighborhood (see sigmaSpace ) will be mixed together, resulting in larger areas of semi-equal color.
sigmaSpace – Filter sigma in the coordinate space. A larger value of the parameter means that farther pixels will influence each other as long as their colors are close enough (see sigmaColor ). When d>0 , it specifies the neighborhood size regardless of sigmaSpace . Otherwise, d is proportional to sigmaSpace .
Any single channel array should belong to one of following data types.
CV_8U – 8 bit unsigned integer
CV_8S – 8 bit signed integer
CV_16U – 16 bit unsigned integer
CV_16S – 16 bit signed integer
CV_32S – 32 bit signed integer
CV_32F – 32 bit floating point number
CV_64F – 64 bit float floating point number
We can define all of above data types for multi channel arrays. OpenCV supports up to 512 channels. Here I am going to show you how to define CV_8U data type for multi channel arrays.
CV_8UC1 – Single channel array with 8 bit unsigned integers which is exactly same as CV_8U
CV_8UC2 – 2 channel array with 8 bit unsigned integers
CV_8UC3 – 3 channel array with 8 bit unsigned integers
CV_8UC4 – 4 channel array with 8 bit unsigned integers
CV_8UC(n) – n channel array with 8 bit unsigned integers (n can be from 1 to 512) )
The class Mat represents an n-dimensional dense numerical single-channel or multi-channel array. It can be used to store real or complex-valued vectors and matrices, grayscale or color images, voxel volumes, vector fields, point clouds, tensors, histograms . M.step[i] >= M.step[i+1]
//3 channels
 //image depth of 8 bits
 //800 x 600 of resolution (800 wide and 600 high)
 //each pixels initialized to the value of (100, 250, 30) for Blue, Green and Red planes respectively.
 Mat image(600, 800, CV_8UC3, Scalar(100, 250, 30));
Mat ()

Mat (int rows, int cols, int type)

Mat (Size size, int type)

Mat (int rows, int cols, int type, const Scalar &s)

Mat (Size size, int type, const Scalar &s)

Mat (int ndims, const int *sizes, int type)

Mat (const std::vector< int > &sizes, int type)

Mat (int ndims, const int *sizes, int type, const Scalar &s)//multi dimensional mat

Mat (const std::vector< int > &sizes, int type, const Scalar &s)//multi dimensional mat

Mat (const Mat &m)//

Mat (int rows, int cols, int type, void *data, size_t step=AUTO_STEP)

Mat (const Mat &m, const Rect &roi)//Mat 	operator() (const Rect &roi) const

Mat (const Mat &m, const Range *ranges)//Mat 	operator() (const Range &roi) const
Use a copy constructor or assignment operator where there can be an array or expression on the right side (see below). As noted in the introduction, the array assignment is an O(1) operation because it only copies the header and increases the reference counter. The Mat::clone() method can be used to get a full (deep) copy of the array when you need it.
// make a 7x7 complex matrix filled with 1+3j.
Mat M(7,7,CV_32FC2,Scalar(1,3));
// and now turn M to a 100x60 15-channel 8-bit matrix.
// The old content will be deallocated
M.create(100,60,CV_8UC(15));
// create a 100x100x100 8-bit array
int sz[] = {100, 100, 100};
Mat bigCube(3, sz, CV_8U, Scalar::all(0));
// add the 5-th row, multiplied by 3 to the 3rd row
M.row(3) = M.row(3) + M.row(5)*3;
// now copy the 7-th column to the 1-st column
// M.col(1) = M.col(7); // this will not work
Mat M1 = M.col(1);
M.col(7).copyTo(M1);
// create a new 320x240 image
Mat img(Size(320,240),CV_8UC3);
// select a ROI
Mat roi(img, Rect(10,10,100,100));
// fill the ROI with (0,255,0) (which is green in RGB space);
// the original 320x240 image will be modified
roi = Scalar(0,255,0);
//locateROI
Mat A = Mat::eye(10, 10, CV_32S);
// extracts A columns, 1 (inclusive) to 3 (exclusive).
Mat B = A(Range::all(), Range(1, 3));
// extracts B rows, 5 (inclusive) to 9 (exclusive).
// that is, C \~ A(Range(5, 9), Range(1, 3))
Mat C = B(Range(5, 9), Range::all());
Size size; Point ofs;
C.locateROI(size, ofs);
// size will be (width=10,height=10) and the ofs will be (x=1, y=5)
double m[3][3] = {{a, b, c}, {d, e, f}, {g, h, i}};
Mat M = Mat(3, 3, CV_64F, m).inv();
//Use MATLAB-style array initializers, zeros(), ones(), eye()
// create a double-precision identity matrix and add it to M.
M += Mat::eye(M.rows, M.cols, CV_64F);
// create a 3x3 double-precision identity matrix
Mat M = (Mat_<double>(3,3) << 1, 0, 0, 0, 1, 0, 0, 0, 1);
If you want to release the data pointed by a array header before the array destructor is called, use Mat::release().
// you can access the element Mij of a 2-dimensional array as:
M.at<double>(i,j) += 1.f;
//rows ptr
// compute sum of positive matrix elements
// (assuming that M is a double-precision matrix)
double sum=0;
for(int i = 0; i < M.rows; i++)
{
    const double* Mi = M.ptr<double>(i);
    for(int j = 0; j < M.cols; j++)
        sum += std::max(Mi[j], 0.);
}
matrix iterator The matrix iterators are random-access iterators, so they can be passed to any STL algorithm, including std::sort().
// compute sum of positive matrix elements, iterator-based variant
double sum=0;
MatConstIterator_<double> it = M.begin<double>(), it_end = M.end<double>();
for(; it != it_end; ++it)
    sum += std::max(*it, 0.);
//rows and cols and at
Mat H(100, 100, CV_64F);
for(int i = 0; i < H.rows; i++)
    for(int j = 0; j < H.cols; j++)
        H.at<double>(i,j)=1./(i+j+1);
// alternative implementation of Mat::isContinuous()
bool myCheckMatContinuity(const Mat& m)
{
    //return (m.flags & Mat::CONTINUOUS_FLAG) != 0;
    return m.rows == 1 || m.step == m.cols*m.elemSize();
}
//foreach
// Creating 3D matrix (255 x 255 x 255) typed uint8_t
// and initialize all elements by the value which equals elements position.
// i.e. pixels (x,y,z) = (1,2,3) is (b,g,r) = (1,2,3).
int sizes[] = { 255, 255, 255 };
typedef cv::Point3_<uint8_t> Pixel;
Mat_<Pixel> image = Mat::zeros(3, sizes, CV_8UC3);
image.forEach<Pixel>([&](Pixel& pixel, const int position[]) -> void {
    pixel.x = position[0];
    pixel.y = position[1];
    pixel.z = position[2];
});
//reshape
std::vector<Point3f> vec;
...
Mat pointMat = Mat(vec). // convert vector to Mat, O(1) operation
                  reshape(1). // make Nx3 1-channel matrix out of Nx1 3-channel.
                              // Also, an O(1) operation
                     t(); // finally, transpose the Nx3 matrix.
                          // This involves copying all the elements
clone() : The method creates a full copy of the array .
copyTo(OutputArray) : The method copies the matrix data to another matrix . Before copying the data, the method invokes : ceate(size,type) .
Mat row(int y) const : The method makes a new header for the specified matrix row and returns it .
Mat cv::Mat::rowRange( int startrow,int endrow) const : Creates a matrix header for the specified row span. startrow is inclusive and endrow is exclusive .
same way with col(int) and colRange(int,int)
isSubmatrix() : return true if the matrix is submatrix of other matrix .
isContinuous(): m.rows == 1 || m.step == m.cols*m.elemSize() so supmatrix is not continues because m.step is the full row elements size but m.cols is sub of original .
adjustROI(int dtop, int dbottom, int dleft, int dright): Adjusts a submatrix size and position within the parent matrix.
locateROI(Size,Point): save size of full matrix and offset x and y to point .
reshape(int channels,dimensions) : Changes the shape and/or the number of channels of a 2D matrix without copying the data.
This is a list of implemented matrix operations that can be combined in arbitrary complex expressions (here A, B stand for matrices ( Mat ), s for a scalar ( Scalar ), alpha for a real-valued scalar ( double )):
Addition, subtraction, negation: A+B, A-B, A+s, A-s, s+A, s-A, -A
Scaling: A*alpha
Per-element multiplication and division: A.mul(B), A/B, alpha/A
Matrix multiplication: A*B
Transposition: A.t() (means AT)
Matrix inversion and pseudo-inversion, solving linear systems and least-squares problems: A.inv([method]) (~ A<sup>-1</sup>), A.inv([method])*B (~ X: AX=B)
Comparison: A cmpop B, A cmpop alpha, alpha cmpop A, where cmpop is one of >, >=, ==, !=, <=, <. The result of comparison is an 8-bit single channel mask whose elements are set to 255 (if the particular element or pair of elements satisfy the condition) or 0.
Bitwise logical operations: A logicop B, A logicop s, s logicop A, ~A, where logicop is one of &, |, ^.
Any function of matrix or matrices and scalars that returns a matrix or a scalar, such as norm, mean, sum, countNonZero, trace, determinant, repeat, and others.
Matrix initializers ( Mat::eye(), Mat::zeros(), Mat::ones() ), matrix comma-separated initializers, matrix constructors and operators that extract sub-matrices (see Mat description).
Mat_<destination_type>() constructors to cast the result to the proper type.
Mat m1= Mat::eye(2,3, CV_32F);
Mat m2= Mat::ones(3,2, CV_32F);
// Scalar by matrix
cout << "nm1.*2n" << m1*2 << endl;
// matrix per element multiplication
cout << "n(m1+2).*(m1+3)n" << (m1+1).mul(m1+3) << endl;
// Matrix multiplication
cout << "nm1*m2n" << m1*m2 << endl;
QImage to Mat and Opposit
image= QImage("C:/Users/malabdali/Pictures/elementary linear algebra.png");
qDebug()<<image.depth();//32 bits depth
m=Mat(image.height(),image.width(),CV_8UC(4),image.bits());
qDebug()<<m.step[0]<<m.step[1]<<" = "<<m.elemSize()<<m.size[1]<<m.type();//2380 number of bytes for row,4 number of bytes for pixel
Mat m(image.height(),image.width(),CV_8UC(4),image.bits());
Vec<uint8_t,4> v=m.at<Vec<uint8_t,4>>(200,200);
qDebug()<<v[0]<<v[1]<<v[2];
how to make assignment by your self
Mat& ScanImageAndReduceC(Mat& I, const uchar* const table)
{
    // accept only char type matrices
    CV_Assert(I.depth() == CV_8U);
    int channels = I.channels();
    int nRows = I.rows;
    int nCols = I.cols * channels;
    if (I.isContinuous())
    {
        nCols *= nRows;
        nRows = 1;
    }
    int i,j;
    uchar* p;
    for( i = 0; i < nRows; ++i)
    {
        p = I.ptr<uchar>(i);
        for ( j = 0; j < nCols; ++j)
        {
            p[j] = table[p[j]];
        }
    }
    return I;
}
or use iterator
Mat& ScanImageAndReduceIterator(Mat& I, const uchar* const table)
{
    // accept only char type matrices
    CV_Assert(I.depth() == CV_8U);
    const int channels = I.channels();
    switch(channels)
    {
    case 1:
        {
            MatIterator_<uchar> it, end;
            for( it = I.begin<uchar>(), end = I.end<uchar>(); it != end; ++it)
                *it = table[*it];
            break;
        }
    case 3:
        {
            MatIterator_<Vec3b> it, end;
            for( it = I.begin<Vec3b>(), end = I.end<Vec3b>(); it != end; ++it)
            {
                (*it)[0] = table[(*it)[0]];
                (*it)[1] = table[(*it)[1]];
                (*it)[2] = table[(*it)[2]];
            }
        }
    }
    return I;
}
on the fly address
Mat& ScanImageAndReduceRandomAccess(Mat& I, const uchar* const table)
{
    // accept only char type matrices
    CV_Assert(I.depth() == CV_8U);
    const int channels = I.channels();
    switch(channels)
    {
    case 1:
        {
            for( int i = 0; i < I.rows; ++i)
                for( int j = 0; j < I.cols; ++j )
                    I.at<uchar>(i,j) = table[I.at<uchar>(i,j)];
            break;
        }
    case 3:
        {
         Mat_<Vec3b> _I = I;
         for( int i = 0; i < I.rows; ++i)
            for( int j = 0; j < I.cols; ++j )
               {
                   _I(i,j)[0] = table[_I(i,j)[0]];
                   _I(i,j)[1] = table[_I(i,j)[1]];
                   _I(i,j)[2] = table[_I(i,j)[2]];
            }
         I = _I;
         break;
        }
    }
    return I;
}
lookup table modification cv::LUT() Performs a look-up table transform of an array. The function LUT fills the output array with values from the look-up table. Indices of the entries are taken from the input array. That is, the function processes each element of src as follows:dst(I)←lut(src(I) )
src
input array of 8-bit elements.
lut
look-up table of 256 elements; in case of multi-channel input array, the table should either have a single channel (in this case the same table is used for all channels) or the same number of channels as in the input array.
dst
output array of the same size and number of channels as src, and the same depth as lut.
Mat lookUpTable(1, 256, CV_8U);
uchar* p = lookUpTable.ptr();
for( int i = 0; i < 256; ++i)
        p[i] = table[i];
LUT(I, lookUpTable, J);
sharpen image example (filter2d or .ptr<>(i,j))
#include <opencv2/imgcodecs.hpp>
#include <opencv2/highgui.hpp>
#include <opencv2/imgproc.hpp>
#include <iostream>
using namespace std;
using namespace cv;
static void help(char* progName)
{
    cout << endl
        <<  "This program shows how to filter images with mask: the write it yourself and the"
        << "filter2d way. " << endl
        <<  "Usage:"                                                                        << endl
        << progName << " [image_path -- default lena.jpg] [G -- grayscale] "        << endl << endl;
}
void Sharpen(const Mat& myImage,Mat& Result);
int main( int argc, char* argv[])
{
    help(argv[0]);
    const char* filename = argc >=2 ? argv[1] : "lena.jpg";
    Mat src, dst0, dst1;
    if (argc >= 3 && !strcmp("G", argv[2]))
        src = imread( samples::findFile( filename ), IMREAD_GRAYSCALE);
    else
        src = imread( samples::findFile( filename ), IMREAD_COLOR);
    if (src.empty())
    {
        cerr << "Can't open image ["  << filename << "]" << endl;
        return EXIT_FAILURE;
    }
    namedWindow("Input", WINDOW_AUTOSIZE);
    namedWindow("Output", WINDOW_AUTOSIZE);
    imshow( "Input", src );
    double t = (double)getTickCount();
    Sharpen( src, dst0 );
    t = ((double)getTickCount() - t)/getTickFrequency();
    cout << "Hand written function time passed in seconds: " << t << endl;
    imshow( "Output", dst0 );
    waitKey();
    Mat kernel = (Mat_<char>(3,3) <<  0, -1,  0,
                                   -1,  5, -1,
                                    0, -1,  0);
    t = (double)getTickCount();
    filter2D( src, dst1, src.depth(), kernel );
    t = ((double)getTickCount() - t)/getTickFrequency();
    cout << "Built-in filter2D time passed in seconds:     " << t << endl;
    imshow( "Output", dst1 );
    waitKey();
    return EXIT_SUCCESS;
}
void Sharpen(const Mat& myImage,Mat& Result)
{
    CV_Assert(myImage.depth() == CV_8U);  // accept only uchar images
    const int nChannels = myImage.channels();
    Result.create(myImage.size(),myImage.type());
    for(int j = 1 ; j < myImage.rows-1; ++j)
    {
        const uchar* previous = myImage.ptr<uchar>(j - 1);
        const uchar* current  = myImage.ptr<uchar>(j    );
        const uchar* next     = myImage.ptr<uchar>(j + 1);
        uchar* output = Result.ptr<uchar>(j);
        for(int i= nChannels;i < nChannels*(myImage.cols-1); ++i)
        {
            *output++ = saturate_cast<uchar>(5*current[i]
                         -current[i-nChannels] - current[i+nChannels] - previous[i] - next[i]);
        }
    }
    Result.row(0).setTo(Scalar(0));
    Result.row(Result.rows-1).setTo(Scalar(0));
    Result.col(0).setTo(Scalar(0));
    Result.col(Result.cols-1).setTo(Scalar(0));
}